
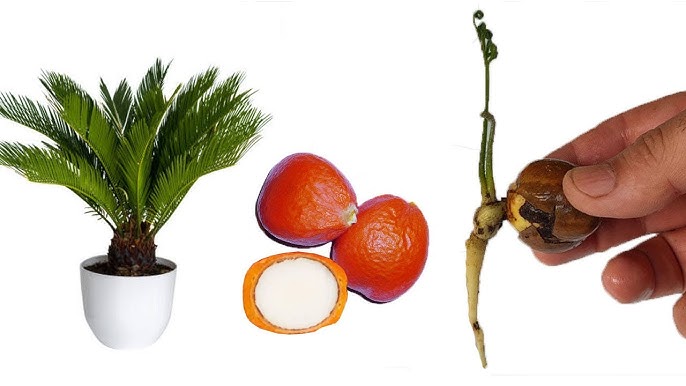
Cycads are often called living fossils, with a history dating back over 280 million years. These ancient plants are prized for their architectural beauty, resilience, and longevity. Whether you’re a passionate plant collector or simply someone who loves adding unique greenery to your garden, learning how to propagate cycads can be incredibly rewarding.
At Hilltop Garden Services, we’ve worked with many cycads over the years, and one thing is certain: while these plants are slow-growing, the process of propagation is well worth the patience. If you’ve ever looked at your healthy cycad and wondered how to create more of these striking plants, this guide is for you.
Why Propagate Cycads?
Before we get into the “how,” let’s talk about the “why.” Propagating cycads gives you the opportunity to:
Expand your garden without constantly buying new plants.
Share with friends or family—a propagated cycad is a truly special gift.
Preserve rare species, as many cycads are endangered in the wild.
Boost your property’s value, since cycads are often seen as premium plants.
In short, propagation lets you multiply beauty, value, and sustainability all at once.
The Two Main Ways to Propagate Cycads
Cycads can be propagated in two primary ways:
From Seeds
This is the natural method but requires time and patience, as cycads grow very slowly.
From Offsets (or “pups”)
This is the most beginner-friendly method. Offsets are small shoots that grow around the base of the parent plant and can be separated and replanted.
For beginners, offsets are the easier and faster route, so that’s where we’ll focus most of our guide.
Step-by-Step Guide to Propagating Cycads from Offsets
Step 1: Identify Healthy Offsets
Look at the base of your cycad. You’ll often see small “pups” growing near the trunk. These are natural clones of the parent plant. Choose offsets that are at least the size of a tennis ball or larger—they’ll have a better chance of survival.
Step 2: Prepare Your Tools
You’ll need:
A sharp, sterilized knife or garden spade
A clean container or tray
Rooting hormone (optional, but recommended)
Well-draining potting mix (a sandy, gritty mix works best)
💡 Tip: Always sterilize your tools to prevent infections from spreading to the plant.
Step 3: Detach the Offset
Carefully dig around the base of the offset, cutting it away from the main trunk. Try to keep as many roots intact as possible, but if it comes away rootless, don’t panic—cycads can still grow roots later.
Step 4: Allow the Offset to Heal
Place the offset in a shaded, dry spot for a few days. This allows the wound to callus over, reducing the risk of rot once planted. Think of it as letting the plant “scab over” before going into the soil.
Step 5: Plant the Offset
Fill a pot with a well-draining soil mix—cycads hate sitting in water.
Place the offset upright, with the base just above the soil line.
Water lightly, but don’t overdo it. At this stage, too much water is the enemy.
Step 6: Care and Patience
Keep the pot in a warm, partially shaded area.
Water sparingly until new growth appears, then gradually increase watering.
Be patient! Cycads are slow movers, and it may take months before you notice fresh roots or leaves.
Propagating Cycads from Seeds (Optional for Enthusiasts)
If you want to take the longer but fascinating route, you can also propagate cycads from seeds. Here’s a simplified process:
Collect seeds from a mature female cycad (with pollination help from a male).
Clean the seeds and soak them in water for a few days.
Plant in a sandy, well-draining mix and keep warm.
Wait… and wait some more. Germination can take months, and seedlings grow very slowly.
This method is more suited for patient collectors or conservation enthusiasts.
Common Mistakes to Avoid
Overwatering – The fastest way to kill a cycad pup is to let it sit in soggy soil.
Planting too deep – Keep the base slightly above soil level to avoid rot.
Skipping the healing step – Freshly cut offsets need time to dry before planting.
Expecting fast results – Cycads are the tortoises of the plant world. Patience is key.
Why Hilltop Garden Services Loves Cycads
At Hilltop Garden Services, we’re passionate about cycads because they combine beauty, history, and resilience. We’ve helped countless homeowners in South Africa integrate these striking plants into their landscapes—whether it’s designing cycad rock gardens, maintaining existing collections, or teaching homeowners how to propagate and care for their own.
When you work with us, you don’t just get a garden service—you get a team that values plants as much as you do.
Final Thoughts
Propagating cycads might take patience, but it’s one of the most rewarding gardening projects you can do. From carefully separating offsets to watching new leaves unfurl, each step connects you to a plant lineage that has survived for hundreds of millions of years.
With the right approach, you can create your very own mini cycad collection—adding timeless elegance and natural history to your garden.
👉 At Hilltop Garden Services, we’re here to help with everything from cycad care and propagation to full-scale garden transformations. If you’d like to learn more about how to integrate cycads into your garden design, get in touch today—we’d love to grow something ancient and beautiful with you.
For more information, visit our website Hilltop Garden Services or call us at (011 807 3773)
Follow us on social media for the latest updates and inspiration for your outdoor space.
Hilltop Garden Services – Keeping your outdoor spaces beautiful, efficient, and effortless all year round.

Recent Comments