
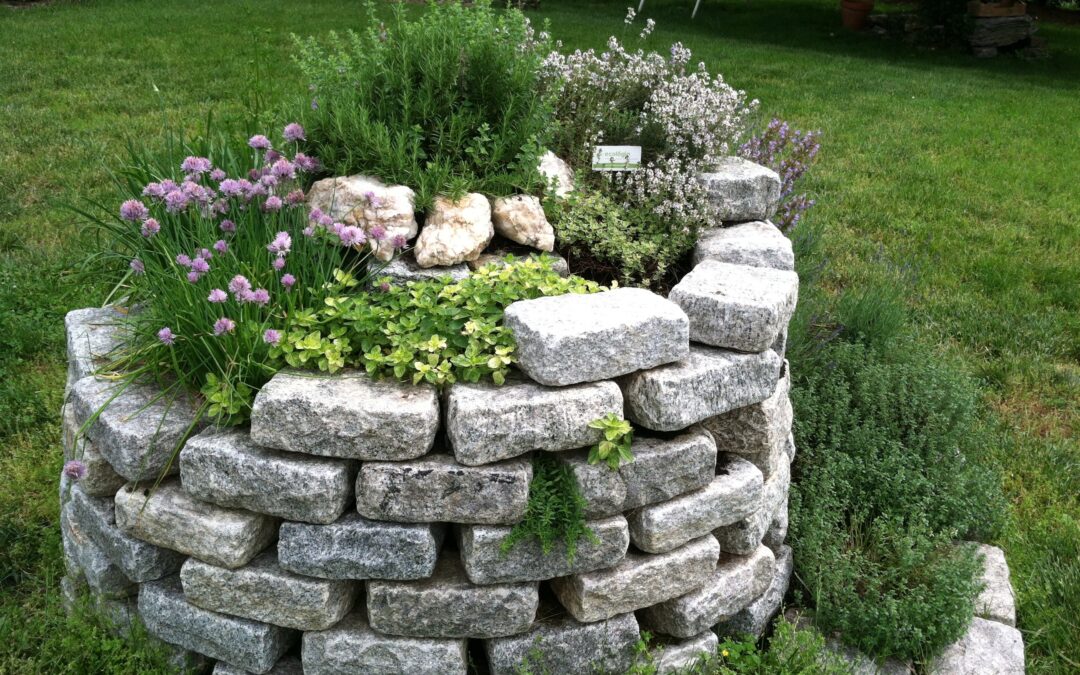
Hey there, fellow garden lovers! If you’ve ever stood in your backyard thinking “I wish I had more space for herbs without turning the whole lawn into a veggie patch”, this post is for you. A herb spiral might just be the most clever little landscaping trick I’ve ever built – and trust me, I’ve built a lot of things.
A few years ago I helped a client in Randburg squeeze a productive herb garden into a tiny 2 × 2 m corner next to their patio. They were renting, had zero space for raised beds, and wanted fresh basil, thyme, and mint without digging up half the yard. We built a herb spiral in one Saturday morning, and the transformation was ridiculous – from a boring patch of grass to a sculptural, multi-level herb paradise. The best part? Their Instagram story of picking fresh oregano for pizza night got shared so much that neighbours started asking for the “spiral guy”. That’s when I knew this humble little feature had serious viral potential.
At Hilltop Garden Services we now recommend herb spirals to almost every residential client who wants edible gardening without eating up their entire yard. They look stunning, save water, make harvesting easy, and give you that “wow, you built that yourself?” reaction every time someone visits.
Ready to build your own? Here’s the complete, no-nonsense guide.
Why a Herb Spiral is Perfect for South African Gardens
Before we get into tools and materials, let’s quickly talk about why this design is so clever:
- Maximises small spaces – You get 6–10 different planting zones in about 1.5–2 m²
- Creates microclimates – The spiral shape gives sunnier, drier spots at the top and shadier, moister pockets at the bottom
- Improves drainage – The raised structure + gravel base prevents waterlogging (huge in Gauteng’s clay soils or Cape Town’s winter rains)
- Low water use – Grouping plants by water needs means less overall watering
- Accessible – Everything is at waist height – no bending or kneeling
- Beautiful – It’s a sculptural focal point that looks intentional and artistic
We’ve built them in tiny townhouse courtyards in Sandton, windy balconies in Umhlanga, and even as a centrepiece in larger suburban gardens in Bloemfontein. They work everywhere.
Materials You’ll Need (Budget: R800 – R1 800)
- Stones / bricks / concrete blocks (about 40–60 medium-sized rocks or 30–40 retaining wall blocks)
- Good quality topsoil (4–6 bags, depending on size)
- Coarse river sand or gravel (1–2 bags for drainage layer)
- Compost (2–3 bags)
- Landscape fabric (optional, but helps with weeds)
- Herbs (see planting guide below)
- Tools: Shovel, trowel, wheelbarrow, spirit level, gloves
Optional extras:
- Small solar fountain pump (for a tiny water feature at the bottom – adds magic)
- Edging stones or decorative gravel for the base
Step-by-Step: Building Your Herb Spiral
1. Choose the Spot
Pick a sunny location (at least 5–6 hours of direct sun) close to your kitchen door – convenience is key. The spiral should face north in the southern hemisphere for maximum sun exposure.
2. Mark the Base
Draw a circle about 1.5–2 m in diameter. Mark the centre and draw a spiral line that winds 2–3 full turns, ending in a small “pool” area at the bottom (optional for moisture-loving herbs).
3. Build the Foundation
- Dig down 10–15 cm and level the base
- Add a 5–10 cm layer of gravel or river sand for drainage
- Lay landscape fabric over the gravel (optional)
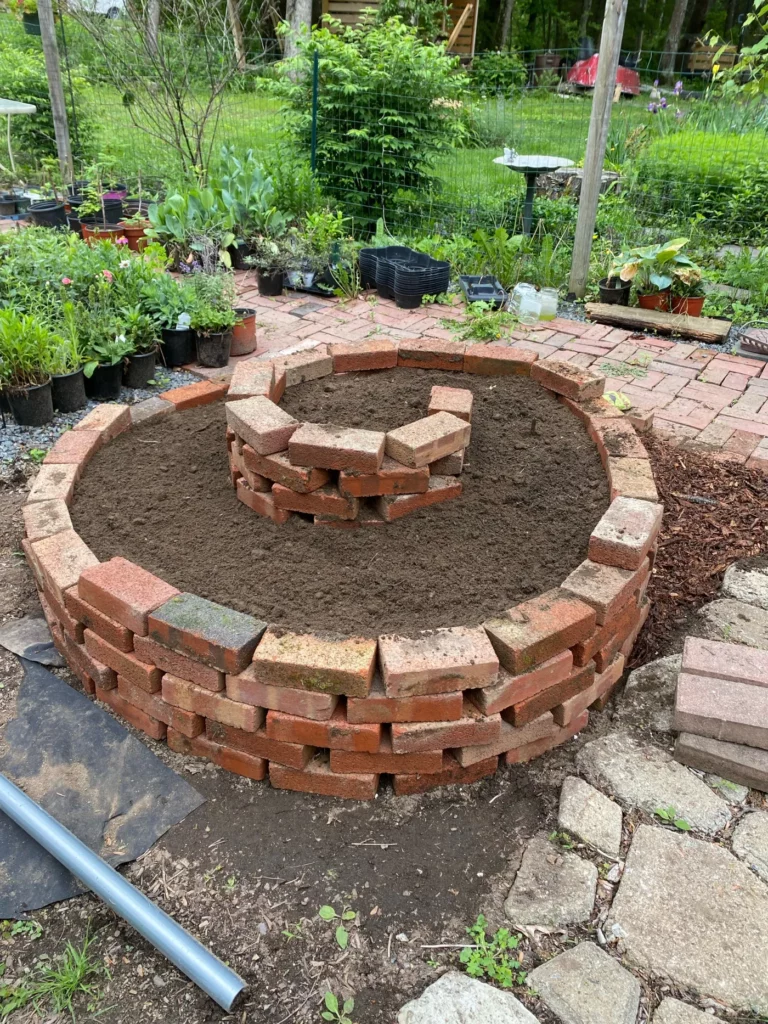
4. Build the Spiral Wall
Start at the outside and work your way in and up.
- Place stones or blocks in a spiral shape, stacking them as you go
- Each layer should be slightly smaller than the one below
- Aim for 3–4 levels – top should be about 60–80 cm high
- Back-fill with soil as you build – pack it firmly
- Use a spirit level to keep each layer reasonably straight
Pro tip: If using natural stones, choose flatter ones for the outer face – it looks neater.
5. Fill with Soil
- Mix topsoil and compost (roughly 70:30)
- Fill each level, leaving 2–3 cm below the stone edge for mulch
- The top should be slightly domed
6. Plant Your Herbs (The Fun Part!)
Arrange plants by their water and sun needs – top = driest/sunniest, bottom = moistest/shadiest.
Top (driest, sunniest):
- Rosemary
- Thyme
- Oregano
- Sage
- Lavender (not strictly culinary, but gorgeous)
Middle:
- Chives
- Parsley
- Marjoram
- Tarragon
Bottom (moistest, shadiest):
- Mint (let it sprawl!)
- Coriander
- Basil
- Parsley (extra)
- Watercress or nasturtiums
Optional bottom “pool” (if you added one):
- Lemon balm
- Vietnamese mint
- Pennyroyal
Plant densely – herbs love company. Mulch with gravel or bark to keep soil cool and reduce watering.
7. Water and Finish
- Water thoroughly once planted
- Add a decorative mulch layer
- Install drip irrigation if you want set-and-forget watering (highly recommended)
Maintenance Tips for Long-Term Success
- Watering: Top once or twice a week in summer; bottom needs more frequent, lighter watering
- Pruning: Harvest regularly – regular cutting keeps plants bushy
- Winter care: In colder areas (Joburg, Free State) cover tender herbs with frost cloth or move pots inside
- Replanting: Annuals like basil and coriander need replacing yearly; perennials last 3–5 years
Why This Project Goes Viral (And How to Make Yours Share-Worthy)
People love a good “small space, big impact” transformation. Take these photos:
- Before: boring patch of grass
- During: building the spiral
- After: lush, planted, with a person harvesting herbs
- Bonus: close-up of someone cooking with the fresh herbs
Caption ideas:
- “Turned 2 m² of boring lawn into a herb paradise in one weekend 🌿✨”
- “Fresh herbs at arm’s length – no more supermarket plastic! #DIYGarden #HerbSpiral”
- “My tiny garden hack that changed everything 🍃”
We’ve had clients get featured on local gardening pages and even a “best small-space gardens” round-up on a lifestyle site. Yours could be next.
Ready to Build Your Own?
If you want the professional version – perfectly level, beautiful stone selection, built-in irrigation, and zero back pain – give us a shout. We build herb spirals as standalone features or integrate them into larger landscape designs.
But honestly? This is one of the most rewarding DIY projects you can tackle. Grab a friend, some rocks, and a few herb plants this weekend – your kitchen (and your Instagram) will thank you.
Have you built a herb spiral before? Drop a photo in the comments or tag us @HilltopGardenServices – we’d love to see your creations!
Happy planting!
For more information, visit our website Hilltop Garden Services or call us at (011 807 3773)
Follow us on social media for the latest updates and inspiration for your outdoor space.
Hilltop Garden Services – Keeping your outdoor spaces beautiful, efficient, and effortless all year round.
Recent Comments